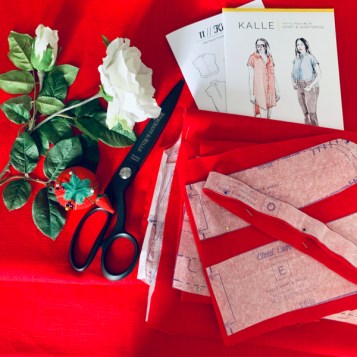
I know, I know.. I’m seriously late to the Kalle party. As I write this, the #kalleshirtdress hashtag features on over 5000 posts on Instagram. And they all look beautiful!
And yet, somehow, I have shied away from Kalle for the longest time. It’s one of those patterns I find myself looking at from time to time, wondering whether to go for it. My usual silhouette is fairly fitted – I don’t have a lot of oversized garments as I’m always worried about the ‘tent-like sack’ look. And yet I do like the look of perfectly proportioned RTW ‘baggy shirts’. So I gathered my courage and decided to give Kalle a chance, in a vibrant red linen. As you’ve probably guessed, I love it and I’m just kicking myself for not having made one sooner!
The Pattern
The Kalle shirtdress pattern actually packs a lot into one envelope, with three lengths (cropped, tunic and shirtdress), three placket options (hidden, popover and standard button), and two neckline options (standard collar and band collar). Oh, and there’s an extension pack for full sleeves, too!

I made view B, the tunic, with a popover placket and standard collar.


Sizing and alterations
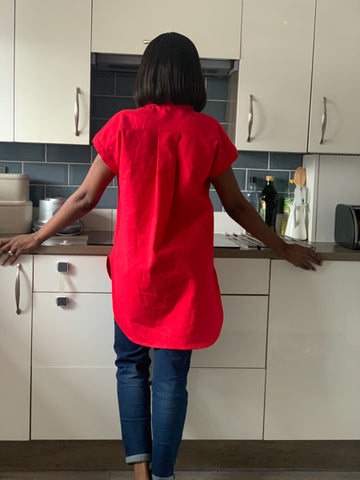
I ummed and ahhed for a while about whether or not to size down. In the end I decided to go with the recommended size for my bust measurement (a size 6). My waist falls into pattern size 8, but given how roomy Kalle is, I didn’t bother with any grading and cut out a straight size 6. I didn’t alter the height at all; I’m about 5′ 6″ and I like where the tunic falls on me.
I will say that at almost every point that I tried it on, up until the collar was installed, I thought it looked way too big. Even just handling the garment, it felt very much like it was not my size. And yet when I finally put it on at the end, over my beloved ‘mum jeans’, it was love at first sight. So if you are unsure about the sizing as you go along, maybe just cross your fingers and give it a chance! I’m glad I didn’t size down for this tunic because I think it looks great with these jeans, which I’m most likely to wear it with. However, it’s still a bit big, in my opinion, when worn with skinny jeans or leggings. I’d like to make the cropped version in white, and would probably be tempted to size down for that. Likewise for the shirt dress – for me this is a lot of excess fabric to try to cinch in at the waist, and I think when I make the shirtdress I’ll probably want to wear it with a belt because I’d probably make it from a less structured fabric. So I’ll give that some more thought next time around!
One other thing I will alter next time around is the high-low hem. Again, I’m really pleased with how it looks here, but when I make the shirtdress I will flatten out some of the ‘scoop’ at the side seam and reduce the difference in length between front and back. It’s a nice feature as drafted but not one I want on multiple garments, and to my mind it works best on the tunic version.
Instructions and drafting
This is my first Closet Case pattern, but I’ve always heard great things about their instructions. Now I see why people rave about them. The pattern pieces were beautifully drafted. Notches were accurately matched, and helpfully placed. I also liked that the cuffs are drafted so as to continue the slope of the shoulder seam, rather than the usual plain rectangle which can stick out a little on short sleeves.
The instructions and diagrams were clear and helpful. It’s labelled an ‘intermediate’ sewing pattern, but I think a confident beginner might be just fine with these instructions, together with the sewalong which looked helpful, from a quick glance. There are three parts of construction I think a less experienced sewer might need to take their time with: the popover placket, the collar, and the yoke, which is attached using the burrito method. If you haven’t come across these garment parts before, I think the sewalong will be a helpful guide, and you may even wish to practise the placket on a piece of scrap fabric first to make sure you’re entirely clear on the process.
One tip I picked up from the instructions was to understitch the bias binding after stitching the first edge to the curved hem. I don’t think I’ve gone so far as to understitch bias binding before but it worked so nicely on what is really quite an exaggerated curved hem that I’m definitely going to do this again for future bias faced edges. The linen was also really cooperative on this edge, and you can see from the images below how neat the curved hem looked even when I had only pressed it after understitching the bias binding. It was a dream to work with. (Oh, and I made sure to trim out some of the bulk of the french seams at the hem before securing the bias tape).


Construction details
I deviated from the instructions in a few ways:
- I changed the order somewhat, and constructed the collar and prepared the pocket in my first sewing session. I like to get small and fiddly bits out of the way first so they are ready for me to just slot in when I need them. Somehow it feels like a time saver! It’s also very satisfying to see a nice neat collar on the table.
- I sewed the side and shoulder seams with French seams. The instructions suggest serging and topstitching the seam allowances to one side, and I can see why they didn’t mention French seams as an option. It’s not usually recommended to French seam a curved seam, but I decided to risk it because the side seam is only curved at the underarm – granted, it’s quite a steep curve there, but it’s also a pretty short curved section. I figured that if the fabric ended up pulling in a weird way, it would only be at the underarm and therefore not particularly visible. On my finished Kalle tunic, there’s only a slight wrinkle which you can see in the picture below, and I definitely don’t feel it or see it when wearing the tunic. So I think it was a good trade-off for the benefit of prettier insides.
- I wanted an easy pullover tunic without buttons, so I stitched the placket closed for the lowest 5″ by doubling up on the top stitching. (First, I tried it on to determine how far I needed it to be able to open, to get it on and off comfortably!).

The fabric
I used a vibrant (“tomato”) red linen from Guthrie & Ghani. It is a thing of beauty. I took the time to pre-shrink the fabric and I think it is definitely more wrinkle resistant than other linen garments I have in my wardrobe.
The pictures of my Kalle were taken shortly after I finished hand stitching the collar stand and sewing on my label by hand. This involved a fair amount of handling, but I was pleased to see that I didn’t really need to press the shirt again after that. It looked pretty much the same after I’d worn it for a whole day of lockdown home schooling with my two under-sevens.
Final thoughts
As you might have guessed, I’m a big fan of the Kalle shirt dress, and I have no doubt that I will make more Kalles. I can see myself making the cropped version and the shirtdress (I can picture both in a lovely white linen, for example). I put this Kalle on as soon as I’d finished sewing it and literally didn’t take it off until bedtime – it was super comfortable and I felt great in the vibrant red colour. This one will be on heavy rotation in my summer wardrobe and will work well for dress down Fridays if we ever make it back to the physical office! Until then, I may just live in it all throughout lockdown.


